Swagger 설정, Google Cloud MySQL 설정을 완료했으니
1. 구글 로그인 사용을 위해 아래 노드 패키지를 설치해준다.
1 2 3 | # passport 설치 $ npm install @nestjs/passport $ npm install passport-google-oauth20 | cs |
2. src 하위에 auth 폴더를 만들어준다.
auth 폴더 하위에 cotroller, service, module 을 만들어준다.
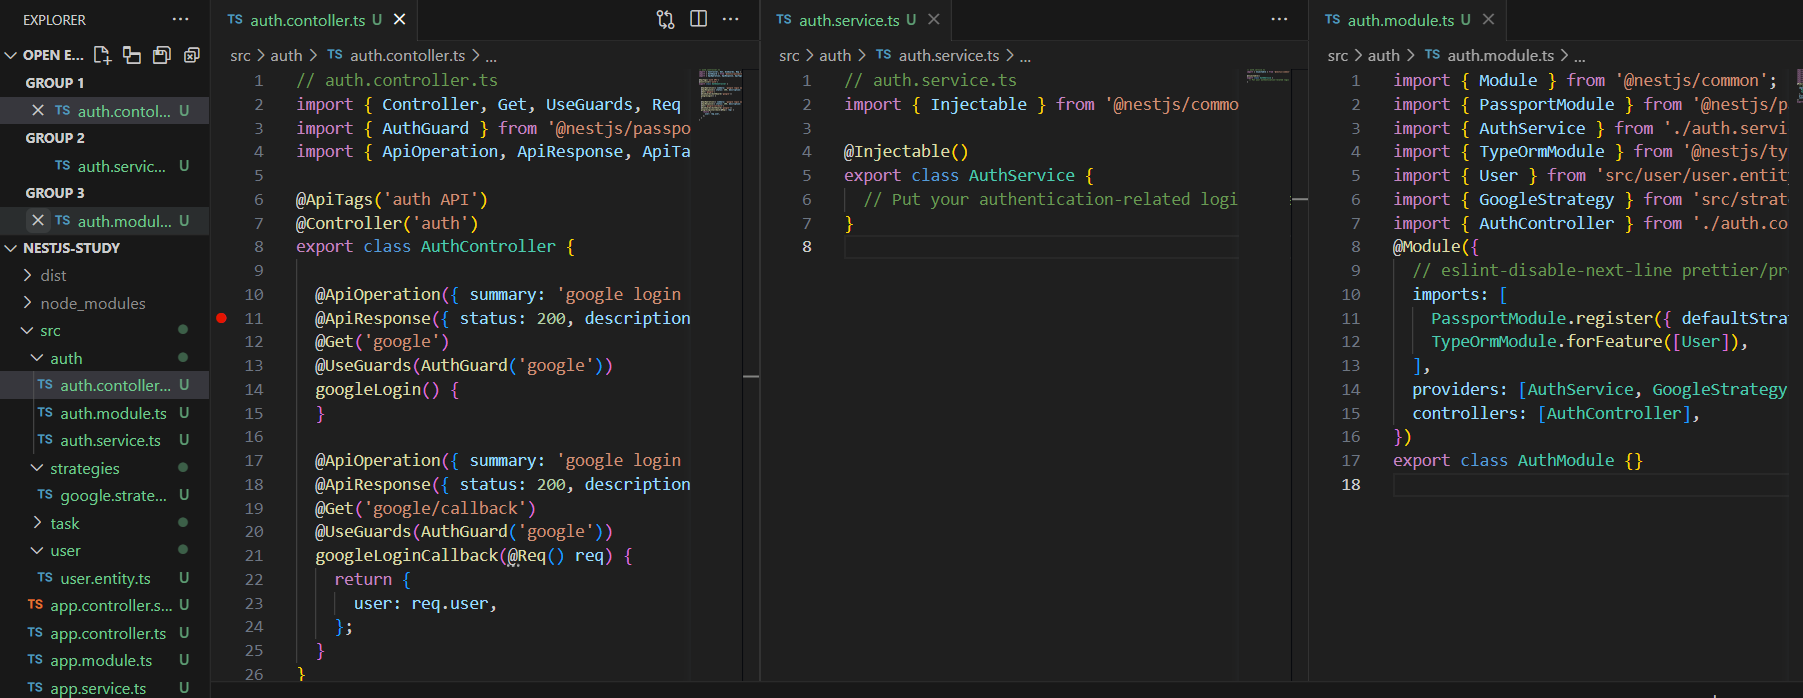
2.1. auth.contoller.ts 생성
// auth.controller.ts
import { Controller, Get, UseGuards, Req } from '@nestjs/common';
import { AuthGuard } from '@nestjs/passport';
import { ApiOperation, ApiResponse, ApiTags } from '@nestjs/swagger';

@ApiTags('auth API')
@Controller('auth')
export class AuthController {

  @ApiOperation({ summary: 'google login auth' })
  @ApiResponse({ status: 200, description: 'google login auth' })
  @Get('google')
  @UseGuards(AuthGuard('google'))
  googleLogin() {
  }

  @ApiOperation({ summary: 'google login auth callback' })
  @ApiResponse({ status: 200, description: 'google login auth callback' })
  @Get('google/callback')
  @UseGuards(AuthGuard('google'))
  googleLoginCallback(@Req() req) {
    return {
      user: req.user,
    };
  }
}
2.2. auth.service.ts 생성
// auth.service.ts
import { Injectable } from '@nestjs/common';

@Injectable()
export class AuthService {
}
2.3. auth.module.ts 생성
import { Module } from '@nestjs/common';
import { PassportModule } from '@nestjs/passport';
import { AuthService } from './auth.service';
import { TypeOrmModule } from '@nestjs/typeorm';
import { User } from 'src/user/user.entity';
import { GoogleStrategy } from 'src/strategies/google.strategy';
import { AuthController } from './auth.contoller';
@Module({
  // eslint-disable-next-line prettier/prettier
  imports: [
    PassportModule.register({ defaultStrategy: 'google' }),
    TypeOrmModule.forFeature([User]),
  ],
  providers: [AuthService, GoogleStrategy],
  controllers: [AuthController],
})
export class AuthModule {}
2.4. Passport의 Google 전략 사용을 위해 src/strategies/google.strategy.ts 파일을 생성 후 작성해준다.
// google.strategy.ts
import { Injectable } from '@nestjs/common';
import { PassportStrategy } from '@nestjs/passport';
import { InjectRepository } from '@nestjs/typeorm';
import { Strategy } from 'passport-google-oauth20';
import { User } from 'src/user/user.entity';
import { Repository } from 'typeorm';

@Injectable()
export class GoogleStrategy extends PassportStrategy(Strategy, 'google') {
  constructor(
    @InjectRepository(User)
    private userRepository: Repository<User>,
  ) {
    super({
      clientID: process.env.GOOGLE_CLIENT_ID,
      clientSecret: process.env.GOOGLE_CLIENT_SECRET,
      callbackURL: 'http://localhost:3000/auth/google/callback',
      scope: ['email', 'profile'],
    });
  }

  // eslint-disable-next-line @typescript-eslint/ban-types
  async validate(accessToken: string, refreshToken: string, profile: any, done: Function): Promise<any> {
    const { name, emails, photos } = profile;

    const user = await this.userRepository.findOne({ where: { email: emails[0].value } });

    if (user) {
      return done(null, user);
    }

    const newUser = new User();
    newUser.email = emails[0].value;
    newUser.firstName = name.givenName;
    newUser.lastName = name.familyName;
    newUser.picture = photos[0].value;

    const result = await this.userRepository.save(newUser);

    return done(null, result);
  }
}
2.5. User 정보 데이터 바인딩 및 저장을 위해 src/user/user.entity.ts 파일을 생성해준다.
// user.entity.ts
import { Entity, Column, PrimaryGeneratedColumn, OneToMany, CreateDateColumn, UpdateDateColumn } from 'typeorm';

@Entity()
export class User {
  @PrimaryGeneratedColumn()
  id: number;

  @Column({ unique: true })
  email: string;

  @Column()
  firstName: string;

  @Column()
  lastName: string;

  @Column({ nullable: true })
  picture: string;

  @CreateDateColumn()
  createdAt: Date;

  @UpdateDateColumn()
  updatedAt: Date;
}
2.6 서버를 실행 후 아래 주소로 접속한다.
http://localhost:3000/auth/google
구글 계정 목록이 나타나고 로그인 시 계정에 대한 정보를 확인할 수 있다.
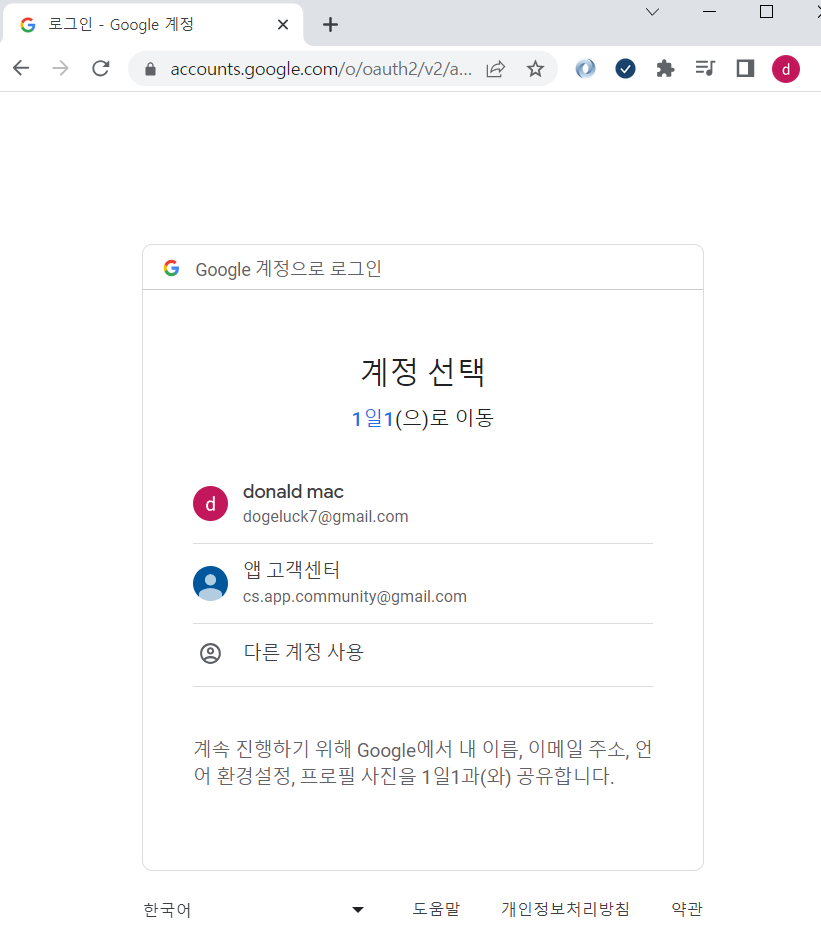

이제 해당 데이터를 가지고 service 단에서 User 정보를 DB에 저장할수 있고
필요한 로직을 추가할수 있다.
기본적인 셋팅이 완료되면 localhost로 갖고있는것보단
Google App Engine을 활용해 NestJS 프로젝트를 바로 올려 DEV(개발용)으로 사용할수 있다.
해당 과정은 이지하므로 포스팅 작성하는것을 생략하려고 한다.
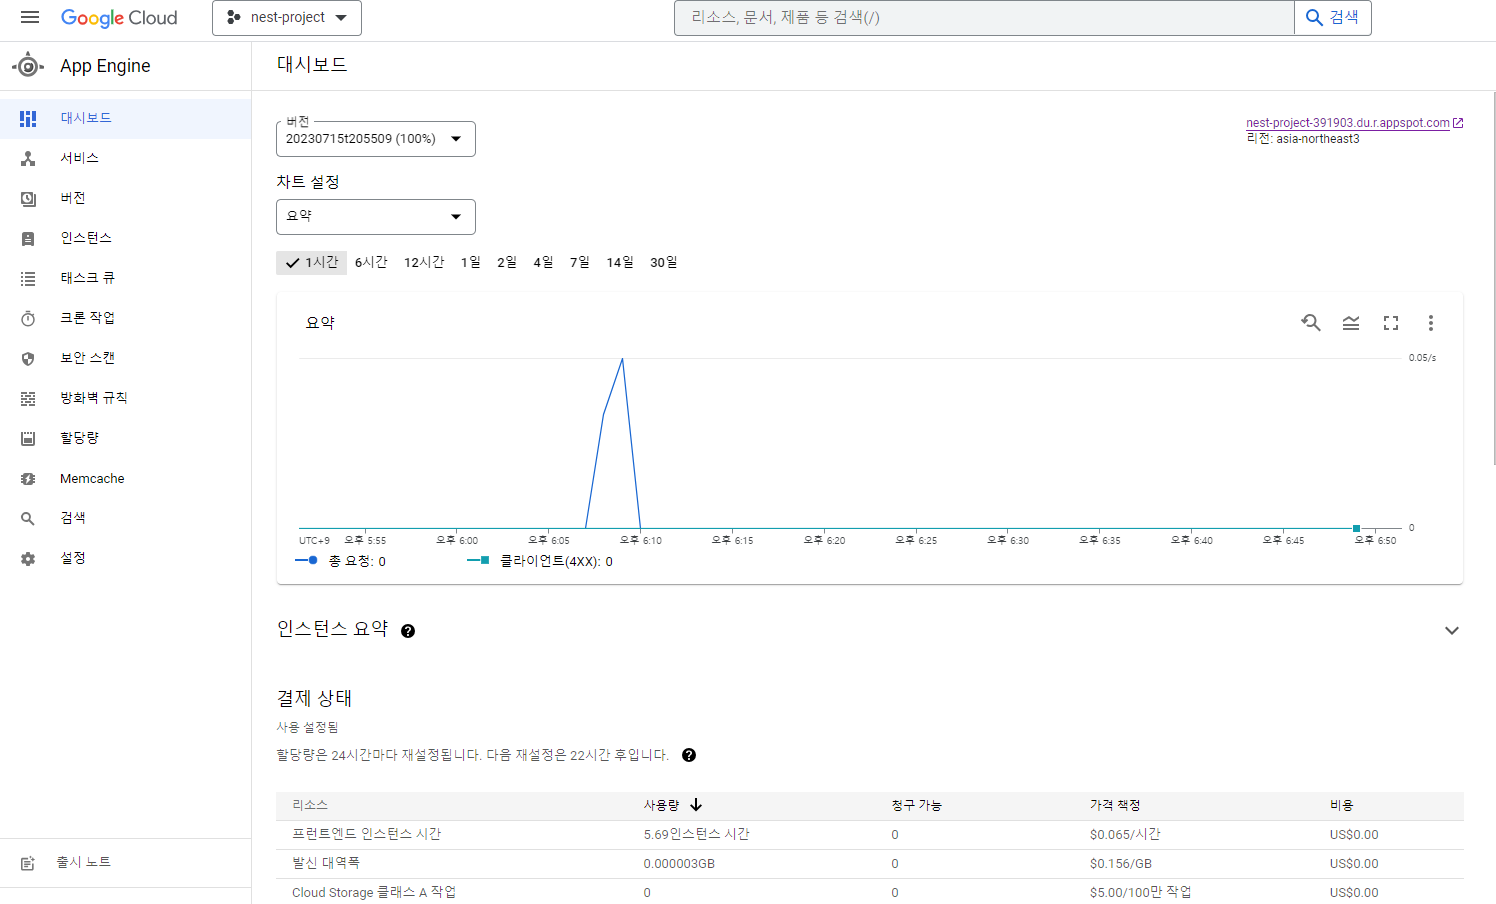
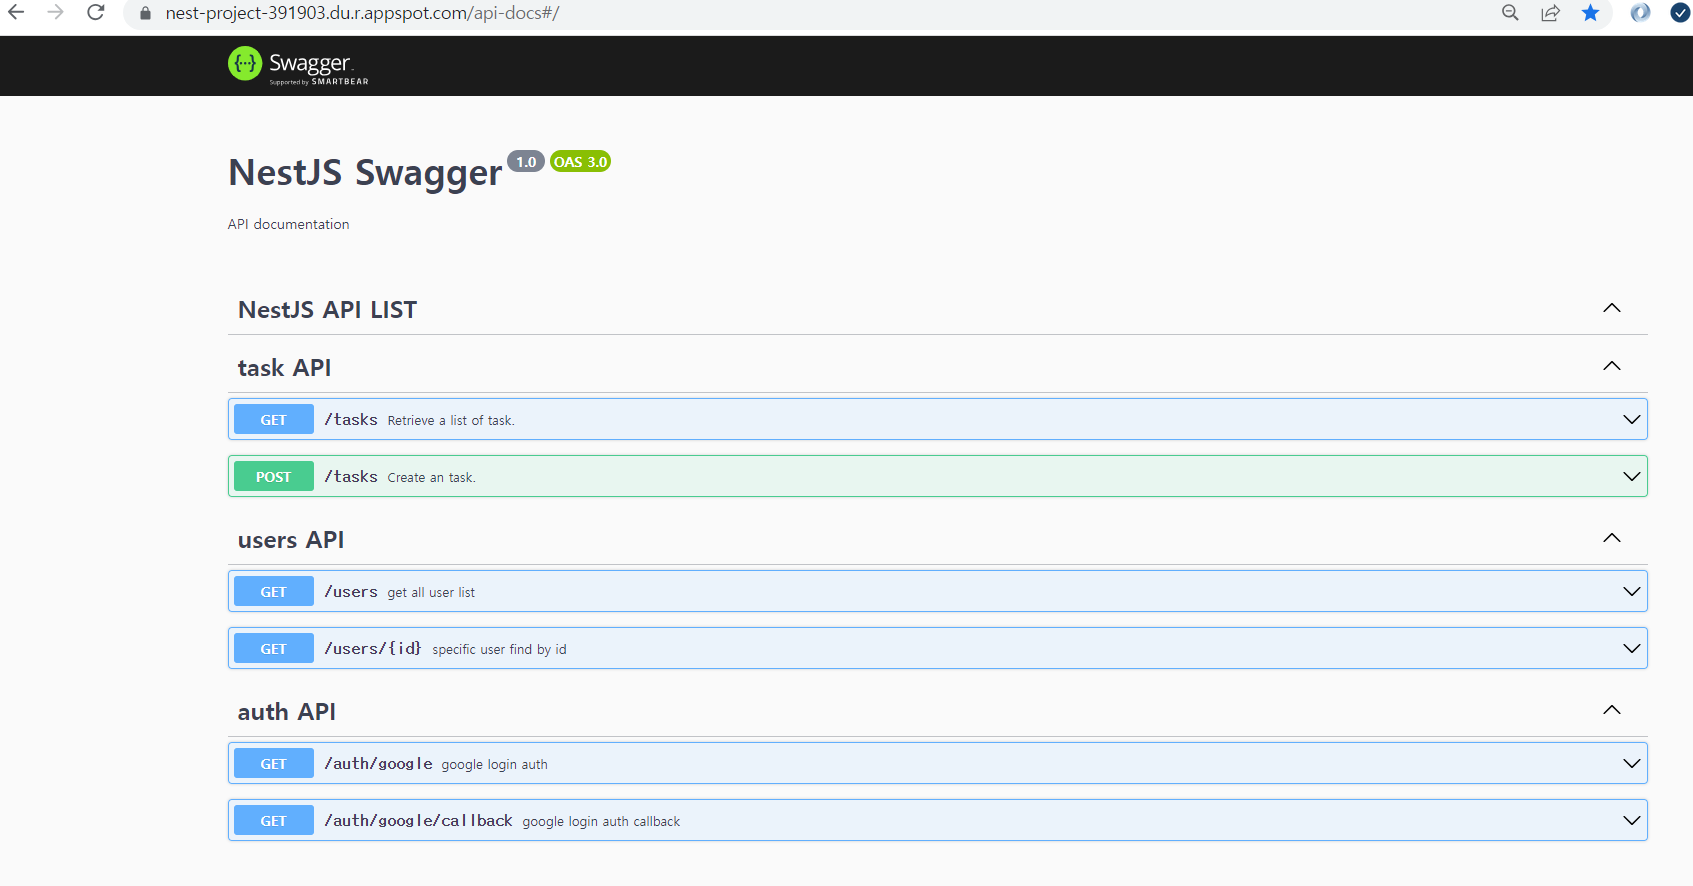
위 이미지를 통해 DEV로 올라간 NestJS 프로젝트 를 확인할수 있다.
마지막으로 github 코드를 첨부한다.
https://github.com/shlee0882/nestjs-study
GitHub - shlee0882/nestjs-study: :cat: Nest JS 스터디
:cat: Nest JS 스터디. Contribute to shlee0882/nestjs-study development by creating an account on GitHub.
github.com
이번 토이 프로젝트는 NetJS에 Google Cloud MySQL , Google App Engine을 붙여사용했는데
개발에 대한 편의성은 높아졌지만 서비스 이용에 대한 비용부담이 커졌다.
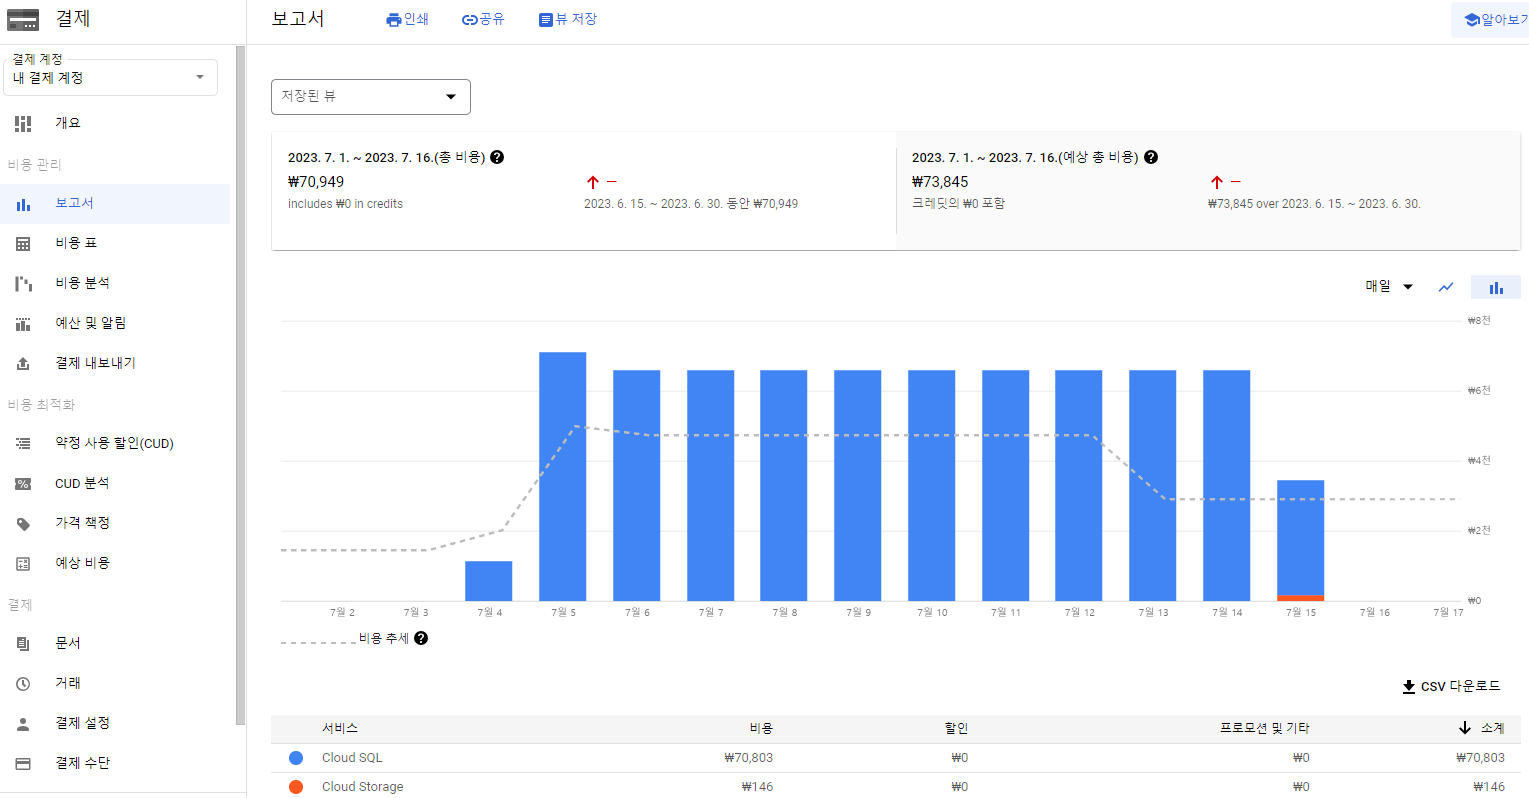
15일 정도 혼자 사용했는데 7만원이라니... 굉장한 과금이다...
개발비용을 고려하지 못한 내 잘못이긴한데 흙수저인 나에게 부담이 되긴하다.

'전체 > NestJS' 카테고리의 다른 글
| NestJs 토이 프로젝트 구성해보기 - 1 (2) | 2023.07.16 |
|---|